Numerous innovations have revolutionized the art of shaping eyebrows, with one notable advancement being brow lamination, which has supplanted traditional tools like tweezers and blades.
In this comprehensive guide, we’ll delve into the intricacies of brow lamination to provide you with a thorough understanding of this transformative technique.
Table of Contents
Everything you need to know about brow lamination.
What is brow lamination?
Brow Lamination is the perming of the brow that involves a chemical treatment process of removing any texture or curl from the brow and making it lie flat. This serves as a perfect treatment to reshape and enhance the appearance of the brow by providing a fuller more even look.
Related: Classic Lash extension: A Comprehensive Review
Differences between brow lamination and microblading.
There is a need to point out some differences between brow lamination and micro blading as the two terms are often used interchangeably. Here are some few differences below:
Brow lamination vs. microblading
- Brow lamination is a straightening treatment of the brow that involves perming while microblading is a temporary tattoo of the brow that gives the effect of more hair strokes in the brow.
- Brow lamination is a procedure that lasts for about 6-8 weeks while microblading is more permanent and can last for 1-2 years.
- Brow lamination is typically cheaper while microblading can be more costly.
Related: Hybrid Lashes: The Beauty Trend You Need to Try
How much does a brow lamination cost?
Compared to other brow procedures, brow lamination is considered affordable and this is likely because the procedure involves little time and less material.
Brow lamination ranges between $75 and $250 depending on the location.
Benefits of brow lamination
Here are some of the benefits that come with brow lamination that you need to know:
- It is a pain-free treatment.
- It is temporary and reversible.
- It is also a quick and cost-effective process.
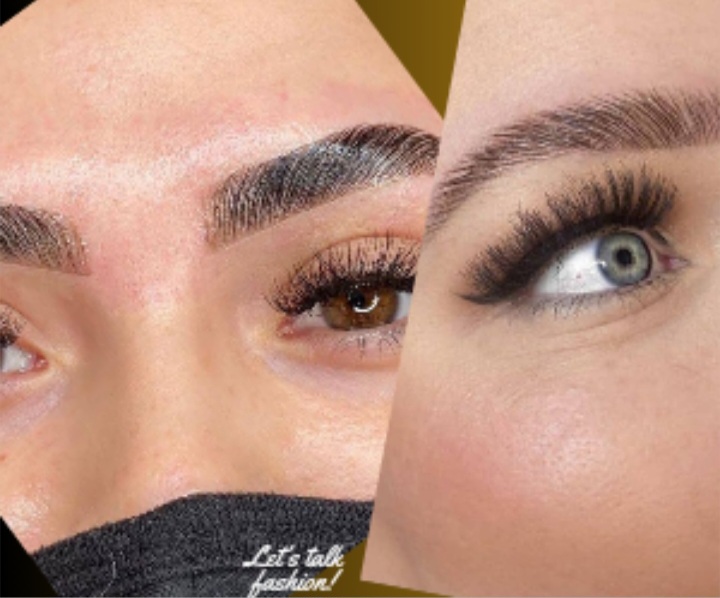
Brow lamination before and after

Before brow lamination:
- The face seems natural as no procedure has been carried out.
- It lacks a well-defined position of the hair brow making it less groomed.
- It can also appear disorganized as uneven distribution of hair creates less distinct brows in some individuals.
- Also, the brow hair may grow downwards, making the hair look less voluminous.
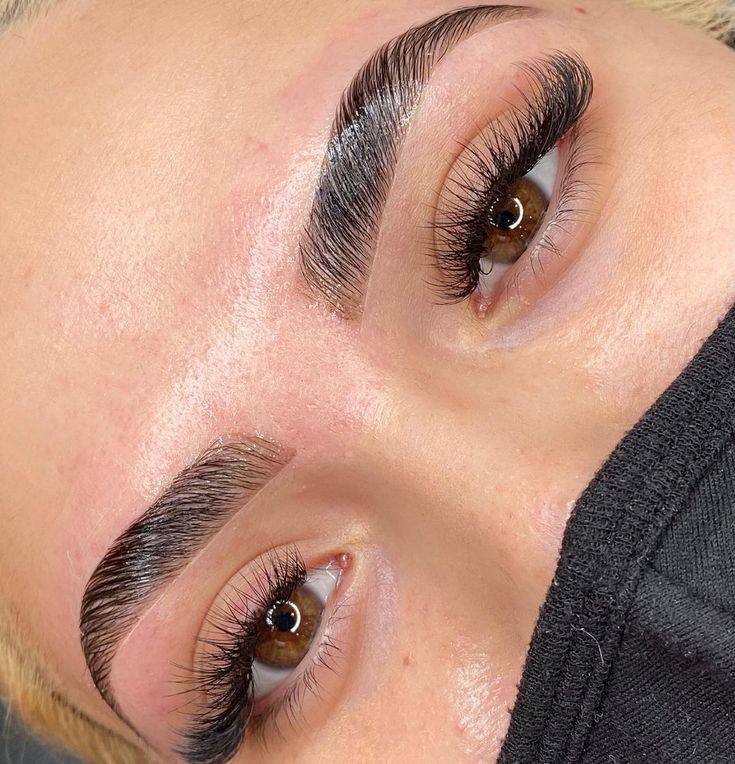
After brow lamination:
- The face will have an improved look.
- The eyebrow will be well-shaped and well-defined.
- The brow is visually appealing and it adds youthful effects to the eyes.
- It also appears in a uniform position making it appear tidy and well groomed.
- The brow will look fuller and fluffier and appear voluminous.
Related: Braces Colors: 10 Best Colors to Match your Every Vibe
What do I need for brow lamination?
For a brow lamination to look good and beautiful, here are the things you need to have:
1. Brow lamination kit:
This is a kit that has all the essential products required for the brow lamination procedure and it includes lifting solution, setting solution, and neutralizing solution.
2. Cleansing and preparation of products:
Cleansing and preparation products such as brow cleansers and brow brushes are also essential products to achieve neat brow lamination.
3. Protection and nourishment:
Brow lamination products such as brow nourishing serums and barrier creams protect the hair brow from dryness and also protect the skin from getting in contact with lamination products.
4. Application tools:
Application tools like micro brushes and brow adhesives are important for applying lamination solutions and can be used to position the brow hairs in the desired position.
5. Aftercare products:
Products such as brow gel add more definition and longevity to brow lamination and are applied to set and style the brows in place.
Related: Daisy Nails: 31 Fashionable Nail Ideas for a Stylish Manicure
How is brow lamination carried out(a step-by-step guide to the procedure of brow lamination)
Step 1: Preparation
Start by cleansing the brow and its area properly with a brow shampoo and double cleanse if the brow is with make-up. The first cleansing will help remove the make-up and the second cleansing help remove any residue from the surrounding area.
Step 2: Applying brow lift solutions
Apply brow lift solution from the root to the tips of the brow with a micro brush and this makes the structure of the hair super soft. These solutions include setting solutions, lifting solutions, and neutralizing solutions. You don’t need to about shaping in this step, just focus on how the cotton will work into the eyebrow.
Step 3: Cover the brow with a thin film
Once you have an even and good coating all over the hair brow, cover the brow with a film and leave for about six to ten minutes for proper hair relaxation. After some minutes, you can check how relaxed the hair is by lifting the film and using the micro brush to straighten the hair.
Use a gentle brush to reshape the brow to create a lifted and sweeping effect for the most flattering brow shape. Continue the process until you achieve a flat, fluffy, and lifted hair state.
The next is to use a cosmetic bud with a flat end to remove all traces of the lift product and ensure all the product is gone. Once all the brow lift products have been cleaned away from the brow, neutralize it by using a lightly damp cotton bud and apply it across the brow shape in the same way as removing the brow lift product.
NB: It is important to neutralize the brow to avoid continuous brow development and over-processing.
Step 4: sculpt
This is a step used to set the brow into their new position and can be done using a lip gloss applicator. Ensure you have a good coating of the sculpt lotion as it will serve as the step that’s going to set the hairs into their new position, therefore every single brow hair must be coated.
Remove the product with a clean cotton pad following the new direction of the hairs to avoid messing up the shape and apply gentle pressure to help keep the shape in place.
Step 5: Tint
This step requires using a brow tint and developer. Always discuss with your client what color they would like to achieve with their brows as part of the consultation. During the lamination, it can be typical to notice discoloration of the hair which often lighten or become very warm in tone. You would need to make a tint color that matches the natural shade of your client to help neutralize discoloration if your client doesn’t want to darken their brows.
Apply the tint from the root to the tip and be as accurate as possible to avoid staining the skin and having a messy and undefined finish. Once the brow hair has reached the right color, remove the tint in sections starting from the first which helps achieve a nice natural finish, then use a dry cotton pad to remove the remaining tint.
NB: Always ensure you’re following the new direction of the hair when you’re removing the tint.
After removing all the tint, apply a small amount of stain remover to a cotton bud and use it to clean the brows again, doing this will prevent any further development of the tint.
Step 6: Nourishing
This is the final step of the brow lamination and it can also be referred to as the oiling stage or article brow essence. Use a cotton pad to pop a couple of drops of the nourishing serum to the top of the brow and apply again with a lip gloss applicator.
After applying it all through the brow, use a micro pop brush and work the oil into the eyebrow. This is the final stage to perfect the shape of your lamination treatment and it’s important to make sure that you get all those hairs nice, flat smooth, and sitting in the position that you ultimately want them to be in and you can apply gentle warm pressure to achieve this.
And you can do some final tweezing to perfect the shape and then just clean up around the brow. And you’ve got a good, perfect, and beautiful brow lamination!
NB: Ensure to tell your client not to wash or get their brows wet for at least 24 hours.
Related: 34 Stunning Fulani Braids Styles to Inspire Your Next Look
Are there risks involved in a brow lamination?
Yes, some risks come with laminating a brow but these risks are quite minimal as brow lamination is a non-invasive procedure. Let’s take a look at some of the possible risks of brow lamination:
- There’s a tendency for the brow to develop skin dryness and hair brow damage.
- The risk of developing an allergic reaction to some of the solutions. Therefore it’s necessary to tell your brow artist if you’re allergic to any substance that the product contains.
- Skin irritation such as peeling, redness, and itching may also occur.
Brow lamination aftercare

Brow lamination aftercare refers to those specific instructions and guidelines that need to be followed to achieve optimal results. These instructions include:
- Avoid applying make-up immediately after brow lamination.
- Too much exposure to rays of light may affect the lamination lifespan.
- Do not use any oily products on the eyebrow area as they can break down the lamination formula.
- Avoid rubbing the eyebrow immediately after treatment to maintain the setting of the laminated brow.
Related: Jumbo Box Braids – 30 Trendy Ways to Style Today!
Conclusion
Overall, eyebrow lamination provides the most satisfying results to people with brows that are lacking in shape, thinning, and unruly.
Brow lamination makes the hair brow appear fuller and fluffier and it lasts for at least 6 weeks which is best for seasonal events.
Related: 34 Stunning Fulani Braids Styles to Inspire Your Next Look